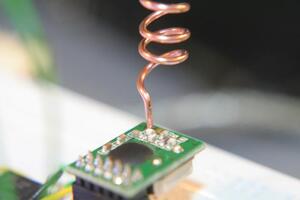
First Steps with RFM12
After some fails with the rfm12 lib, we tried another one. We just used sensor and receiver system from tahina.priv.at and modified some things. everything is in our git repo
Latest News
- 2011-03-25
- IO Ports are rare on my atmega so i installed a MCP23S17 16 Port SPI IO Expander
- Copied and edited a demo file to a more or less library and hacked arround with LED's on this µC
- Commit Diff is here: 84bdaacd9d1fb10aef7f9ab85d0c381c1f2ce4d6
- Images can be found in Album 2011-03-25
- 2011-03-22
- LCD On the system! Used a HD44780 and a proper LCD Library
- Found out that HD44780 LCD need just 5V Supply Voltage, but can read from 3.3V atmega. Got 5V from usbbb so everything cool
- Hacked a little bit arround with LCD, see this commit: f5cd63ddc43f1a67782001f3c2aeddc95a6cf6a0
- Receiver can now be used as standalone thermometer
- Steps to do: use eeprom of sensor
- 2011-03-20
- The Lib is in our form available in our git repo.
- Pictures of our sensors and breadboards are available in the gallery of reox
- Fuses for attiny45 shoud be:
avrdude -p attiny45 -U lfuse:w:0x62:m -U hfuse:w:0xdf:m -e efuse:w:0xff:m(like default) - The Antenna Port is not the one with "ANT" next to it, but the port right to it! The other one is GND (this is not clearly visible from datasheet)
- Interrupt driven RX and TX is not really working...
- The Power of attiny45 and RFM12 can be downed to 1.9V until it does not send anymore (when using 1.8V TX not working)
- Found out: temperature and voltage measurement
Hacks and Tweaks
- Measure Temperature with attiny: temperature
- Measure Supply Voltage with attiny: voltage
